Your first verified Workflow: a complete guided exercise
This exercise builds a small, understandable process from a CSV to a verified CSV result. It covers Repository, Mapping, Session, Workflow and Monitor. Use a laboratory tenant with the permissions needed to create, edit, publish and run; those permissions can be separate. Prepare a compatible worker and a source/destination location it can access. A browser-local path is not automatically a worker path.
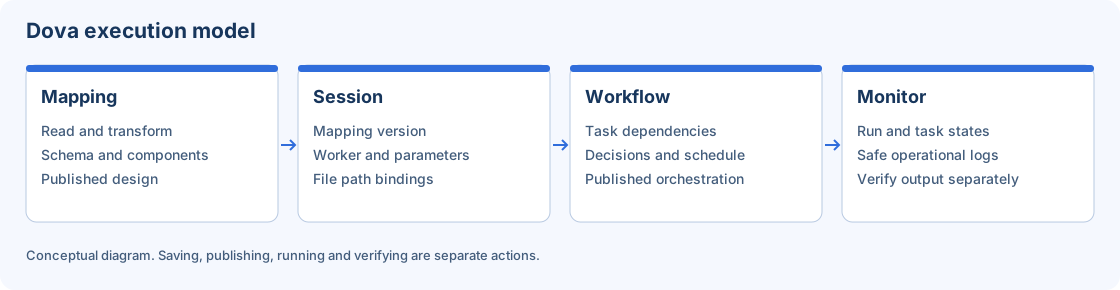
Conceptual execution model. Complete each responsibility before proceeding to the next.
1. Prepare a predictable source
Create a synthetic file named customer_demo.csv with this content:
id,name,amount
1,"  Ana  ",10
2," Luis ",20
3,"Marta",30
The expected result contains three records and the fields id, name and amount. The name values should become ANA, LUIS and MARTA after trimming and uppercasing. Decide the expected row count and values before running so that acceptance is independent of the application's success message.
Place the file in an authorized laboratory location accessible by your worker. Reserve an output such as customer_demo_clean.csv that no operational process uses. Confirm read access to the input and write access to the destination.
2. Create the repository location
- Open Repository and confirm the active tenant.
- Create or reuse a laboratory Domain named
Training. - Create a Folder named
CustomerDemoin that Domain. - Select the Folder and verify the displayed location before creating objects.
Use distinct names rather than replacing a customer's existing objects. A Folder name alone is insufficient to identify its Domain and tenant.
3. Build and publish the Mapping
- Open Mappings and create
m_CustomerDemoin the laboratory Folder. - Add Flat File input, Clean text and Flat File output.
- Configure comma delimiter, header and the intended fields on the input.
- In Clean text, select
nameand thetrimandupperoperations. - Configure the output format, header, encoding and delimiter explicitly.
- Connect input → cleaning → output. Select each component to inspect its settings.
- Choose Validate and resolve the reported problems.
- Use Save draft, then Publish with the required permission. Record the published version.
The Mapping describes format and transformations. Its Session supplies runtime file paths. Arrange and Fit help readability; they do not validate data or publish a version.
4. Bind and publish the Session
- Open Sessions and choose New session.
- Name it
s_CustomerDemo_Test, select the published Mapping and choose Environment Test. - In Runtime, keep Use tenant default or select an authorized compatible override.
- In File paths, fill the source and target bindings with worker-accessible laboratory paths.
- Inspect Parameters; leave overrides empty unless this design declares them.
- Save draft, address validation messages and publish the accepted Session.
Check its Mapping version. Choosing Test is a context label; it does not substitute for a separate output path or isolate an accidentally shared destination.
5. Orchestrate and execute
- Open Workflows and create
w_CustomerDemoin the same laboratory location. - Add a Session task that references your published Session.
- Connect the available Start, Session and End tasks in the intended order.
- Validate, save the draft and publish the accepted Workflow.
- Run manually before adding any schedule and record the attempt identifier.
- In Monitor, inspect the global state, task states and safe operational log.
6. Accept the actual output
Open the authorized result and confirm exactly three records, the expected field names and the normalized name values. Also inspect output encoding/header and whether an unwanted extra field appeared. A green task does not replace these checks.
For a controlled negative case, change only the laboratory Session input to a nonexistent file, save and publish the accepted Session, then review and accept the Workflow's dependency update before publishing and running the laboratory Workflow. Inspect the failure. Restore and publish the correct Session binding, review the Workflow dependency again, and inspect a separate new attempt. Keep the old error evidence according to retention policy.
Disable any temporary schedule and remove only laboratory objects whose dependencies and retention permit it. Continue with Mappings, Sessions, Workflows and Monitor.